
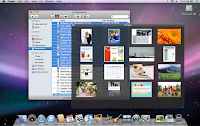
 In Ubuntu 7.10 Enabling Compiz-Fusion is your first step closer to getting eyecandy visual effects and functionality similar to OS X Leopard. If you havent enabled it yet, watch my video tutorial here.
The beauty of Ubuntu 7.10 is it comes with Compiz Fusion pre-installed and on supported hardware offers a wide variety of Visual Effects beyond OS Leopard .
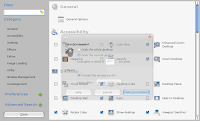
Depending on your graphic card and GPU/CPU power you have from three levels of Visual Effects to enable (In Ubuntu Go to System -> Preferences -> Appearance ).

Visual Effects Tab shows the options which are:
None,Basic(simple visual effects like shadows , fading windows-menus) and Advanced.
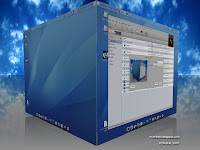
I recommend you select Advanced to turn on effects like wobbly windows, transparency , animated workspace switching and the 3D Cube.

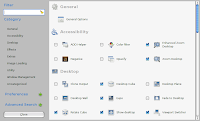
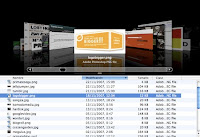
To further enable and customize more Desktop Effects, you need to enable the Compiz Configuration Manager by typing the following in a Termial Window:
Now instead chose the menu option for "Advanced Desktop Effects Settings", and you will get a screen similar to this:

Notice under the "Desktop" heading of the configuration window there are visuals and features similar to OS X Leopard already, such as showing the desktop while having transparent windows, having virtual spaces and switching between them in various ways.
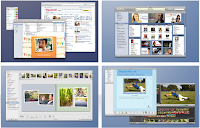
All of these and more can be done in Ubuntu aswell , just check off the boxes in the "Advanced Desktop Effects Settings" beside what you want. I found these to be a good balance of neat visual effects and functionality which did not affect my PC's performance.

Depending on your graphic card and GPU/CPU power you have from three levels of Visual Effects to enable (In Ubuntu Go to System -> Preferences -> Appearance ).
None,Basic(simple visual effects like shadows , fading windows-menus) and Advanced.
I recommend you select Advanced to turn on effects like wobbly windows, transparency , animated workspace switching and the 3D Cube.

To further enable and customize more Desktop Effects, you need to enable the Compiz Configuration Manager by typing the following in a Termial Window:
sudo apt-get install compizconfig-settings-manager
sudo apt-get install emerald
After you have installed this , you wil see the option "Advanced Desktop Effects Settings" as shown in the image above.sudo apt-get install emerald
Now instead chose the menu option for "Advanced Desktop Effects Settings", and you will get a screen similar to this:


Notice under the "Desktop" heading of the configuration window there are visuals and features similar to OS X Leopard already, such as showing the desktop while having transparent windows, having virtual spaces and switching between them in various ways.


All of these and more can be done in Ubuntu aswell , just check off the boxes in the "Advanced Desktop Effects Settings" beside what you want. I found these to be a good balance of neat visual effects and functionality which did not affect my PC's performance.
Other Tips Users have watched
- Get Ubuntu (Linux) to look like OS X Leopard!
- Ubuntu Advanced Desktop Effects
- Free Windows Cursor Themes - with CursorFX 2.0
- Boot Up Windows Faster
- Enabling Remote Desktop from XP to Vista
- Windows Vista PowerToys - Tweaks from Microsoft TechNet
- Speed up your Windows Search
- Free Up windows resources which are slowing you down
- Customize Windows Send To (right click menu items)
- How to Change to Owner Name in Windows
- Customize your Windows Explorer View
- Disable User Account Control Popups
- Top 10 Free Downloads to improve and tweak your Windows Vista