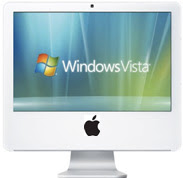
 If your interested to install Windows dual boot on a Intel Mac, this article will guide you through the installation of it via BootCamp. All you need is an Intel Mac
Lets assume you have everything you need, lets go through the steps:
The Installation
1: Once you have downloaded from Apple the BootCamp package you will want to double-click on the Icon labeled “Bootcampassistant.pkg”. This will install the Boot Camp installation assistant which will aid you in the rest of the process of preparing your Mac for Boot Camp.
The BootCamp install process will help you partition your drive for Windows.
Ensure you have allocated enough space for your Windows installation, at minimum use a 15GB partition when asked during this BootCamp Assistant screen setup, the max size is 32GB.
2: Boot Camp will ask you to create a Windows drivers disk. You should do this. You will want to check the radio button that says “Burn a Macintosh Drivers CD” put in the blank CD and then click continue.
3: Boot Camp should ask you to insert the Windows XP/Vista Installation Disk. It should recognise the Vista disk once it has mounted and it will proceed to reboot
NOTE: If it does not recognise the Windows Installation Disk, restart your Mac, and hold down the "C" key and wait for the boot-loader to pop-up, and then chose the Windows install DVD from there. This should proceed to the the Windows Setup install process.
Assuming you got this far and installed Windows successfully

4: Next you need to know about how to switch between Operating systems, to do this simply restart the machine and when it hits the grey boot screen hold down the option button and two hard drives will appear on the screen. They are labeled with the appropriate name of each OS, select it and hit enter.
Also if your interested in learning how to dual boot Windows XP/Vista with Ubuntu (Linux) take a look at my tutorial and detailed article here.


